Thanks to the expanded array of insulation options now on the market, an insulation upgrade can open up once-overlooked areas of your home into livable space. Establishing a budget—based on research of all available options—is important whether you use a contractor or go the DIY route.
With your homework done, you’re ready to tackle a transformative home insulation project. Whether you’re saving money by increasing efficiency or reclaiming cubic space in your home, the results are sure to be dramatic and worth the effort.
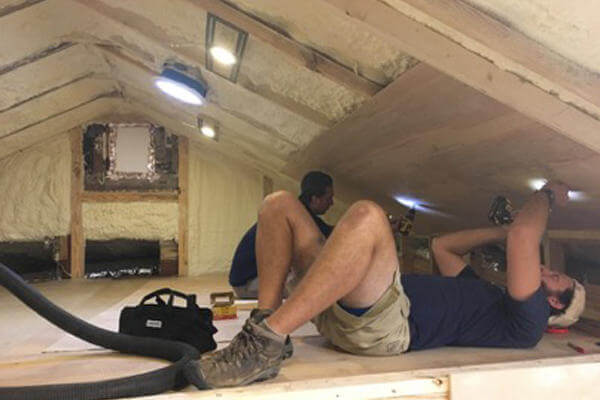
Inspiration Project #1: Attic to Loft Conversion
Converting an unused attic into a loft can add serious square footage to a home. However, depending on the state of the existing space, it could be a major undertaking. It's still cheaper than adding to the existing structure or moving to a new home in an effort to gain a little extra breathing room.
Insulation Challenges
- Not enough space at the ceiling for insulation and venting if the rafter space is not adequate. Lack of venting can result in trapped heat in the summer, creating a pocket of hot air in the space.
- If there are exposed floor joists, the space between the joists needs insulation as well before flooring is installed.
- Older homes might have moldy or decaying insulation that must be removed.
- Any gaps or openings in the roofline must be sealed before installing new insulation and covering walls.
Insulation Solutions
- Build out roof to increase cavity size for insulation and add room for venting, or sister wider boards to each rafter.
- Consult an insulation professional to extract decaying or moldy insulation. Treat the attic space if mold, rodent or insects have left behind any toxic residue.
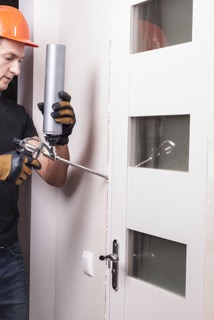
- Seal the gaps in the attic space with a canned sealant if not using closed cell spray foam as the insulating material.
- Consult an energy professional to project air flow and heating and cooling needs for maximum efficiency.
Selecting Insulation
Spray Foam — Closed cell spray foam seals and insulates at the same time, but it needs up to 24 hours to cure, a process that can include off-gassing. This requires occupants to vacate the home. It’s also possible to use canned spray foam to seal any gaps at the roofline and between the floor joists and the ceiling below.
Fiberglass Batt — This is likely the best option for floor joist framing. Pre-sealing any gaps is necessary prior to installation, but this type of insulation offers a DIY option that, with proper backing and sealing of gaps in the surrounding framing, is a good insulating choice. However, it may be difficult in many climates to reach the required R-Value if it’s applied directly to the sheathing below a roof.
Ask a Pro
"Fiberglass is an option for any project. Fiberglass is usually the first level and then from there anything else is an upgrade." —Dan Post, president and owner of Arctic Express Insulation
Rigid Foam — Foil-faced ISO provides a vapor barrier, but similar to fiberglass batt it may be difficult in many climates to reach the required R-Value. However, custom cut pieces of rigid foam are easier to seal around the edges with a can of spray foam. It’s an excellent option for insulating walls.
Blown-In — Cellulose is too messy for this future living space, and fiberglass glass shards pose a respiratory risk in a living space that is open to the rest of the house.
Inspiration Project #2: Basement Home Theater
Whether the desired result is a man-cave or just a place for family and friends to gather, you can’t ask for a cozier spot than a basement theater that’s built with style and function in mind. Inherently out of the way, a basement home theater offers privacy and a place to unwind.
Insulation Challenges
- While the drive of a thundering bass line could be heaven for someone enjoying his or her favorite tunes or an action flick in a basement media room, lack of insulation might result in annoyance for someone trying to have a conversation or a quiet evening in the living space above.
- Basements are infamous for moisture intrusion, a situation that must be remedied before setting up expensive seating or television and stereo equipment.
Insulation Solutions
- Insulate or add to the existing insulation in the ceiling above the theater room to minimize sound.
- Hire a professional to assess the nature of any moisture or water seepage. Foil-faced ISO rigid board can help insulate smooth basement walls (5), and furring strips can then be attached to the foam when it's time to build out the walls. In addition, spray foam can help insulate the basement in certain areas, but consider double-coating it with a fire-protective paint.
Selecting Insulation
Spray Foam — Foam can be used to seal some areas of the basement. The foam needs time to cure, so the basement will be off-limits during that process. Open cell spray is also an option for the space above the theater as a sound barrier.
Blown In — Dense-packed cellulose will provide a thorough sound barrier over the basement room.
Ask a Pro: Preventing the transfer of sound is all about sealing the spots where sound can travel, not just relying on insulation. "If there's an air space around a door, you're going to hear sound across that door. If it's sealed, you won't." —Richard Burbank, co-owner and president of Evergreen Home Performance
Rigid Foam — Foil-faced ISO rigid foam insulation can be used to insulate basement walls and provide moisture resistance.
Fiberglass Batt — Batt doesn't have the sound-reducing quality that open-cell or dense-pack cellulose provides. If the walls are already built out, however, fiberglass batts could add insulation for the basement.
Inspiration Project #3: RV insulation makeover
Who doesn't dream of the open road—traveling from coast to coast in a house on wheels? Whether the plan is to RV full-time or just on vacations, a well-insulated motorhome can save money on gas, propane and electric hookup charges. But make no mistake, an RV wall assembly bears no resemblance to one in a home, so proceed with caution.
Insulation Challenges
- RVs have prefabricated wall systems that make it difficult to disassemble them to add insulation.
- Even if one could get into the walls of an RV, new or old, the interior space is very thin, and much of the room is already taken up.
- Adding after-market insulation to the walls could void warranties and make it difficult for mechanics or body experts to repair the multitude of electrical and mechanical systems in modern RVs.
Insulation Solutions
- Sealing the gaps in the floors of an RV, even new ones, that allow outside air to get in can prevent heat loss or gain.
- If refurbishing an older RV, thin foam insulation is the best bet to fit into walls.
- Consider attaching foam to empty walls inside the RV to increase R-Value.
- RV skirting that encircles the vehicle can keep the weather from entering the interior from underneath.
Selecting Insulation
Spray Foam — Canned spray foam can be used to seal floor gaps. But traditional spray foam can encase electrical and wiring systems, making it difficult or impossible for service personnel and repairmen to access them. Plus, foaming entire walls can make repairing dents or accident damage a nightmare.
Ask a Pro
"I definitely wouldn’t line the walls with spray foam just because it's impossible to deal with later. We see a lot of accident damage … and rebuilding a coach is no stranger to us. Trying to do so if we had to deal with some sort of added barrier would be chaotic." —Chris Anderson, service advisor at Beckley's Camping Center in Thurmont, Maryland
Rigid Foam — Thin pieces of rigid foam will work in RVs where there is no insulation already. Also, rigid foam applied to blank spaces on the interior of the RV helps for further climate control.
Blown In — There’s too much dust with blown-in insulation for the closed quarters of an RV, and there's no space in the interior walls to blow in material.
Fiberglass Batt — Lack of space for batt insulation.
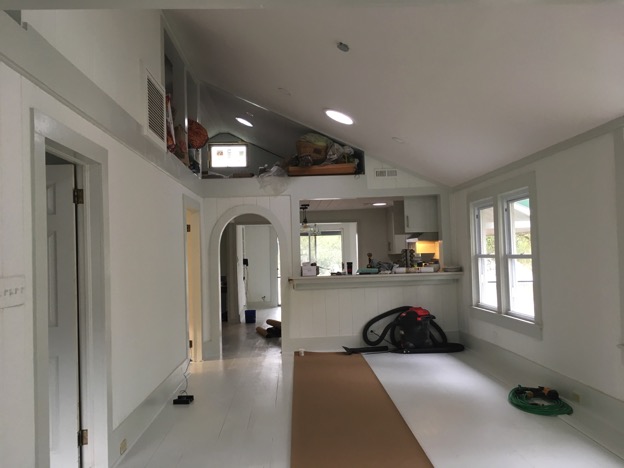
Inspiration Project #4: Drop Ceiling to Cathedral Ceiling Conversion
Who doesn't love cathedral ceilings? They can make all but the tiniest of spaces feel voluminous, and unlike their vaulted cousins, they provide a built-in design template via the existing roof pitch. However, there are challenges when trying to add a little grandeur to a living space.
Insulation Challenges
- Similar to an attic-loft conversion, there has to be enough space to adequately insulate and vent the area.
- Raising the ceiling changes the home's airflow and conditioned space, possibly requiring a re-evaluation of the home's HVAC system.
- There will most likely be insulation in the rafters or just above the drop ceiling, and it could become moldy or rot if exposed to the elements via leaks or gaps in the roof.
Insulation Solutions
- Build out the ceiling or sister wider boards to the rafters to increase the depth of the available space for insulation and venting.
- Hire a professional to do an energy audit and evaluation to determine if any changes need to be made in the heating and cooling system.
- If there is existing insulation that has become toxic, a professional will be able to remove it quickly and efficiently.
Selecting Insulation
Spray Foam — Closed cell spray foam seals and insulates at the same time. It needs up to 24 hours to cure, a process that could include off-gassing. This requires occupants to vacate home. Canned spray foam can be used in small gaps to make the space airtight.
Ask a Pro: "Drop ceilings are not usually airtight, and they often have lights in them. [Conversion to a cathedral ceiling can be a] huge improvement in trying to create an air barrier." —Richard Burbank, co-owner and president of Evergreen Home Performance
Fiberglass Batt — Offers a cost-effective option for interior insulation but may not provide enough R-Value if applying directly between rafters as the only insulating layer between the roof and ceiling.
Blown In — Cellulose loose fill is too dusty for this application, and blown-in fiberglass would leave glass shards in living-space air.
Rigid Foam — Foam could be cut to fill the space between rafters and sealed with spray foam, but it’s more efficient to use foam for the entire space.
Inspiration Project #5: Wall Retrofit
It's a no-brainer that filling an empty exterior wall cavity with insulation will increase the R-Value of the wall. While builders usually include insulation in exterior walls, older homes might not have any or conditions may have led to its disintegration or thinning.
Insulation Challenges
- Limited visibility during installation.
- Ensuring that insulation fills the entire cavity.
- The walls have batt insulation in them or another insulation that takes up a lot of space.
- Destroying the exterior while drilling insulation holes.
Insulation Solutions
- Use a slow-expanding open cell foam that heats up during installation. Installers can then ensure the foam has filled the wall cavity using an infrared camera.
- Barring an installation that will allow the installer to "see" how much of the cavity fills up, blow-in loose-fill cellulose or dense-packed cellulose is another option. Installers can also blow in cellulose or fiberglass if there is too much insulation in the wall for foam.
- No matter the type of insulation, develop a plan with the contractor to patch the resulting holes.
Selecting Insulation
Spray Foam — Slow-expanding open cell spray foam will work, but closed cell can harden too fast to achieve a satisfactory fill. Again, the curing process might dictate that occupants leave the home for up to 24 hours.
Ask a Pro: If there is no access from the exterior, professional installers can inject foam into the walls through sheetrock inside the house, but "it's just a big mess when you go inside of a house and drill."
—Dan Post, president and owner of Arctic Express Insulation
Blown In — Another option, but care must be taken to ensure that it fills the cavity properly.
Fiberglass Batt — Too thick and unwieldy to stuff into existing wall cavities.
Rigid Foam — Rigid foam board works best when it can achieve a tight seal, which is not likely in a wall retrofit.
Please note: The five projects and images in this guide are not intended to be used as instructions for DIY projects. Some of those projects—like attic to loft conversions—alter the dimensions of a room or add livable square footage that likely requires local permitting and oversight. In both the attic-loft and drop ceiling-cathedral ceiling conversion scenarios, someone qualified must inspect the areas and make a determination as to whether the roof framing is a conventional one or a one-piece truss system. For a truss system, the homeowner would have to hire an engineer to redesign the system for proper loads before he or a contractor could begin any major alterations. Likewise, before turning a basement into a home theater, the homeowner should consult an expert in diagnosing common water intrusion issues.
"When you're making a change to the house, and you're affecting where heat flows and where air flows and where moisture flows, there's a lot of combinations of things that could end up causing problems," says Richard Burbank of Evergreen Home Performance. He suggests not only speaking to an insulation contractor, but a qualified energy auditor who can provide options for what the homeowner needs—not just what someone wants to sell.
According to Burbank, there can be so many ancillary issues involved with a major project that sometimes "insulation is probably the easiest part." He notes that "botched" projects keep him very busy.
Feeling inspired? Read on to part 4 to learn about how green roofs and “low-E” windows can take your insulation to the next level.
About Kim Slowey
Kim Slowey is a freelance writer based in Florida. She has a degree in journalism but spent 25+ years in the construction industry and is still a Florida-certified general contractor. Kim currently covers commercial and residential construction and real estate for publications such as Construction Dive and Forbes. To learn more about insulation and insulating your home, please check out The Home Depot website.


